Silhouette photos are very popular and once you know how to take them, actually quite easy to pull off.
The best part is that you can create shots like this with just about any camera.
Because you are exposing the bright areas of the image correctly and letting the subject go completely dark, you don’t need a high-end camera with a lot of dynamic range. In fact, you can shoot silhouette images with just about any camera that gives you some control over the exposure.
Here are my simple steps for creating some compelling silhouette photos.
1. Find A Bright Light Source To Shoot Towards
The basic formula for a silhouette photo is having a bright background with a dark subject.
Because of the difference in the brightness, you can adjust the settings so that the bright light source (often the sky) is exposed properly and the subject is completely dark.
So the first step to setting up your silhouette photo is to find an interesting light source.
2. Look For Bold Contrast Between The Subject and Background
Good silhouette composition is about more than just the shape that your subject creates.
You also need enough contrast between the silhouette and the background to ensure that the subject stands out.
Make sure there aren’t other objects in the way that will also create silhouettes. Things like trees or buildings in the background can be useful for the composition (more on that later), but you don’t want them overlapping with your subject.
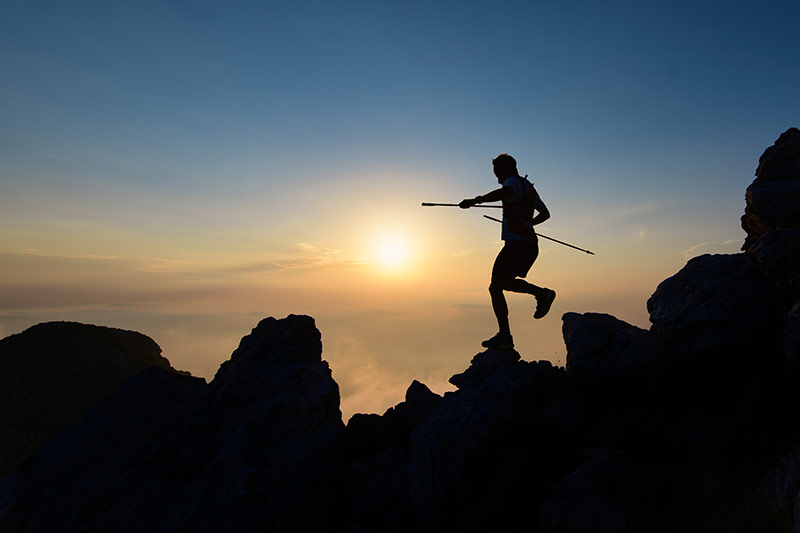
3. Use Or Create Interesting Subjects
This might seem simple but is often overlooked.
You could just go with a person standing in front of the sky, but it won’t be very unique.
There are a couple of ways to make the image more interesting.
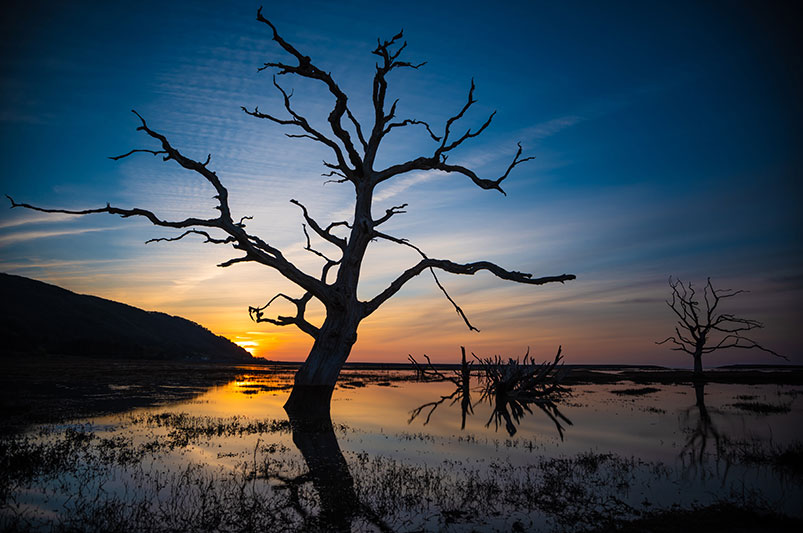
You could choose a subject that has an interesting shape. Remember that the only thing that will show up is the outline of the subject, so any inner details will be completely lost. So when you are choosing a subject, think about what would make an interesting outline.
The other way to add interest to your silhouette image is in the way you pose or arrange the subject. Whether it is a dance pose or arm position, use the posing to create an interesting silhouette.
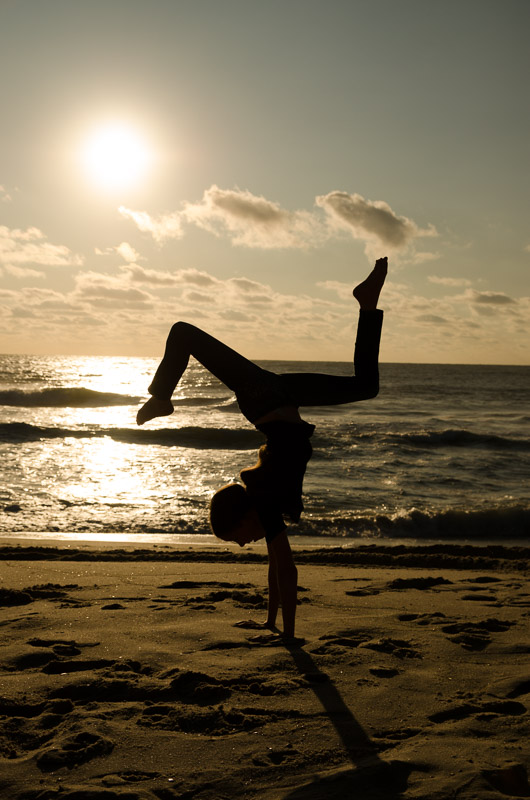
When shooting inanimate objects, be sure to try different angles to see which one will create a more interesting shape or emphasize the shape of the object.
If your subject is a person, make sure you pose them in such a way that their outline is apparent in the photo. For example, if the person is looking at the camera or away from the camera, you’ll just get the shape of their head, but if they look to the side, you can see the outline of their facial features. Neither is wrong, but give this some consideration when posing them.
4. Find Strong Shapes For Your Composition
In addition to the main subject in your image, you can use other shapes in the image to help with the composition.
I already mentioned that large objects like a building or tree can be a problem if they obscure the silhouette of the subject, but they can be useful to if you compose the image carefully.
You can use other objects like that to frame your image by placing the subject between two buildings for example.
These shapes can also be part of the story you are telling. Perhaps you can use background objects to play with depth and scale. For example, you could make a person appear larger than a tree if they are much closer to the camera.
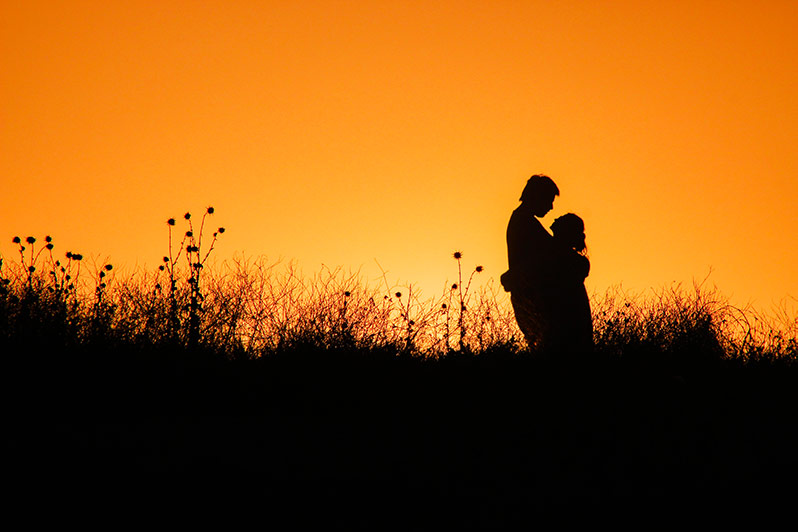
5. Separate Subjects For Good Silhouette Visuals
This one kind of goes with creating contrast, but something to keep in mind when you have multiple subjects is that you want to make sure each one is distinctly visible within the image.
You can also do the opposite and use two people, for example, to form a shape of a silhouette.
6. Use Manual Mode
For a silhouette image, you need total control over your camera settings.
When you use “auto” mode for exposure, the camera will look for the average of the brightness in the image. This means that instead of a silhouette, the camera will try to expose everything “properly” in the image.
Instead of that, you want to adjust the exposure such that the bright background is exposed properly and the darker subject falls to completely black to create the silhouette.
7. Focus On The Edges of the Silhouette
Your camera’s autofocus system needs contrast and edges to focus on. When the subject itself is completely dark and heavily backlit, the camera may have difficulty finding an edge to focus on.
There are two ways to work around this.
First, you can switch to manual mode. Use the screen on the back of your camera and zoom in to 100% while adjusting the focus to ensure they are sharp.
Second, and my preferred method, is to use single-point autofocus and set that point on the edge of the subject so that your camera can use the contrast between the bright background and the dark silhouette.
Using autofocus is the preferred method when shooting people or anything else that isn’t perfectly still.
8. Use Your Subject To Block The Primary Light Source
Whether you are shooting into the sun or just another large light source, if there is a single point of that light source, it is helpful to play your subject in front of it.
Doing so will allow you to control the exposure better. You can still have the subject be completely dark, but doing this will make it easier to capture more of the color in the sky for example.
9. Enhance The Image With Post Processing
Don’t forget to add the finishing touches to your images.
In most post-processing software, you can adjust specific areas of an image based on their brightness value. That means that if you followed the first 8 tips, the subject will already be darker than the background and you can accentuate that difference by lowering the shadow (darker) areas of the image.
Another option is to use a brush tool to decrease the exposure only on the subject by brushing the changes specifically on the subject.
I use Adobe Lightroom for making changes like this. If you want to get started learning the basics of Lightroom, CLICK HERE to sign up for my FREE Lightroom Launch Course for Beginners.
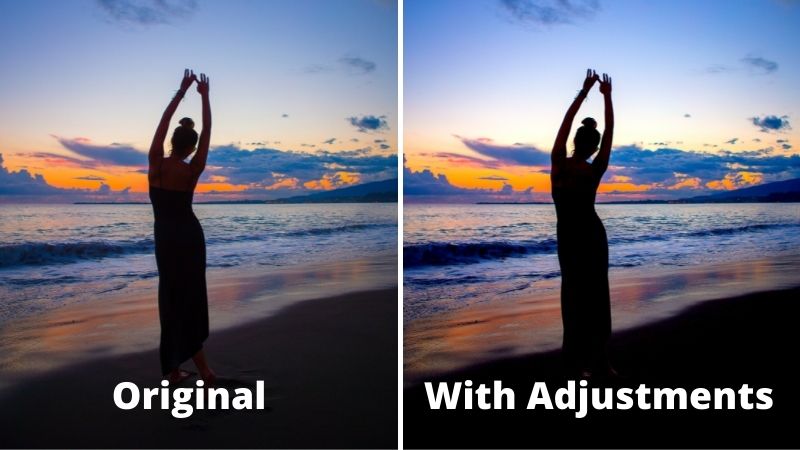
In the images above you can see if you look closely at the image on the left that some of the detail on the woman is still visible. A quick adjustment in Lightroom allowed me to drop the exposure on the woman enough to make her completely a silhouette.
Some of you may prefer the original, some of you the adjusted one. But either way, some simple editing skills will give you the ability to easily choose between the two.
How Do I Take Silhouette Pictures of Myself?
Taking a silhouette of yourself is a little tricky, but the easiest way to handle it is by using the manual mode in your camera and adjusting the exposure so that the bright background (often the sky) is exposed properly, then set a timer for the shutter and jump into the frame. Be sure to check the results and try a few times to make sure you get it right.
How Do I Take Silhouette Pictures On My Phone?
To take a silhouette picture on your phone, simply tap the screen where the bright background is. That will tell your phone to expose the photo for the sky instead of the darker subject in front of it. The subject should be underexposed and appear as a silhouette in the final image.
In order to take a silhouette photo on your phone, you need to tell the phone to expose for the background and not the subject. This can be done in most cases by simply framing your shot and tapping on the brightest part of the image. If there is enough of a difference in brightness then the subject should become a dark silhouette.
Keep in mind that all the same tips above also apply to taking silhouette pictures on your phone as well. Many phone apps will also let you control the exposure manually, so try that too.