

So you’ve just purchased your first DSLR camera and you’re headed out to the park, the beach, or some other great outdoor spot to take photos of friends and family.
You take a few shots and they look…well…terrible.
That’s because taking photos in the middle of the day is not easy for even the most experienced photographer. So here is a guide to help you get the best camera settings for bright sunlight and create some epic outdoor photos.
Photography, at its core, is the manipulation of light, so logically step one is to begin understanding that big burning thing we see in the sky every day – our main source of light – the Sun.
If you just getting started with photography and want a cheat sheet to help you remember the most important steps when taking photos, then CLICK HERE to grab our Beginner’s Shooting Checklist. It’s a great tool to help you get comfortable with the steps needed to handle situations like bright sunlight.
You can also check out this guide on the best camera settings for outdoor portraits.
Why Bright Sunlight Is Not Good For Photography
The intensity of the sun and the way the light interacts with what we see around us changes with the height of the sun throughout the day.
As the sun rises overhead the intensity and brightness increase; shadows become smaller and the world becomes lit up with light bouncing and reflecting off every possible surface.
By midday, a huge influx of bright light from multiple directions is now shining through the lens and hitting the sensor.
Harsh sunlight casts sharp dark shadows on your subjects, and the intense reflections cause glare on the lens. Blown-out highlights and difficulty obtaining a desirable exposure becomes all too common.

To combat this in your photography you need to adjust your camera settings and objective to suit the conditions. Time to swallow your pride, face your fears and start pressing those scary buttons and rolling them frightening dials…
Camera Settings To Use In Bright Sunlight
There are three main changeable variables on every manually operated camera – shutter speed, aperture, and ISO.
Shutter Speed
The shutter speed is the length of time the sensor is exposed to the light – three seconds will capture a firework in the night sky, whereas 1/1000 of a second will capture a sharp action sports shot.
Aperture
The aperture is the diameter to which the shutter opens. The larger the diameter (measured in F-stops) the lighter is let in, but the shallower the depth of field will be.
When shooting a landscape, this could mean that the foreground flowers are blurry, while the mountains in the background are sharp, with an F-stop between 2 and 5. To maintain a larger area of focus in your image you would need a smaller shutter diameter – you would achieve this by increasing the F-stop between 9 and 12.
ISO
The final variable is the sensitivity of the sensor itself – this is manipulated via the ISO control. Increasing the ISO value will increase your exposure and brighten the image. This is especially helpful in low-light conditions. The downside is that too high of an ISO level will cause the image to be grainy and soft.

Putting The Three Together
The goal of the photographer is to balance these three variables to produce the desired image. If you are shooting action sports, the goal is to achieve sharp images of fast-moving action. Fast shutter speed and high F-stop will help freeze the motion and keep the action in focus, but a compromise would have to be made with a higher ISO, and possible grain, to maintain brightness.
When capturing fast-moving action on a sunny day I like to start with my settings all on 8’s – 1/800s, 800 ISO, and F-8. From there I would adjust, maybe reducing the ISO if it is bright, increasing my shutter speed if there is motion blur, or increasing the F-stop if I’m having difficulty getting the action in focus.
If you are capturing still scenes then you can decrease the ISO, and lower the shutter speed to suit. On a sunny day, you may have your ISO at 50 and your shutter at 1/250. For that shallow depth of field with foreground and background bokeh then lower the F-stop number and up the shutter speed to compensate for the increase in light.
Under Exposing In Bright Conditions
One technique that often works well for those of you that use photo editing software (and I highly recommend learning if you don’t) is to underexpose the image by about one stop.
Most modern cameras handle shadows better than they handle highlights. That means that even when you have “hot spots” of brightness in your image, you’ll have better luck toning them down and raising the shadows if your image is a little underexposed.
Don’t underexpose too much though or you’ll end up with too much noise in the photo. One stop is good but in especially harsh brightness, you can get away with 2 stops.
Shooting In The Shade
Shooting in the shade can also be difficult on sunny days.
Look for things like buildings or large trees to place your subject behind. Of course this doesn’t work if you are shooting landscapes.
When shooting landscapes, you have to be aware that some of the image may be in sun and other parts may be in the shade.
If your subject is in the shade then exposing your subject correctly would cause areas lit by the sun to likely be overexposed.
If your subject is in the sun, but there is a lot of shade in the scene, then correctly exposing the subject would cause the shaded areas to appear very dark.
Blend Multiple Images
One way to combat this would be to set the camera on a tripod and take the same photo with multiple exposures, set for the different light levels in the scene, and combine the images into one HDR image using a program such as
Your camera is most effective when these variables are balanced. Typically, adjusting exposures will involve a few clicks on each of the variables, meaning neither one of the three is cranked really high or left behind when the others are changed. As you familiarise yourself with the relationship between ISO, shutter speed and aperture, setting exposures on the fly will become second nature.
Ways To Avoid Harsh Sunlight In Your Images
One of my favorite ways to avoid harsh sunlight is to use a polarizing filter – not the kind of filter you put on the picture of your cat on Instagram, but a piece of circular glass that screws to the end of your lens.
The polarizing filter only lets in wavelengths of light traveling at a certain angle. This cuts much of the reflective glare bouncing off everything around you and helps achieve a better exposed and colored image. I find it is especially useful when shooting around water on a bright day.
Check out our guide to Using A Polarizing Filter For Portraits.
A lens hood is also helpful by blocking reflective rays from the peripheral and reducing glare on the lens. And while not necessarily convenient, it is best to not shoot directly toward the sun. When facing the sun, the side you will see of your subject will be in shadow, and likely backlit, making a balanced exposure difficult.
Best Sun Angle For Photography
I find that the best and most effective way to avoid harsh sunlight is simply not shooting in the harsh sunlight (real cutting-edge tip…right?).
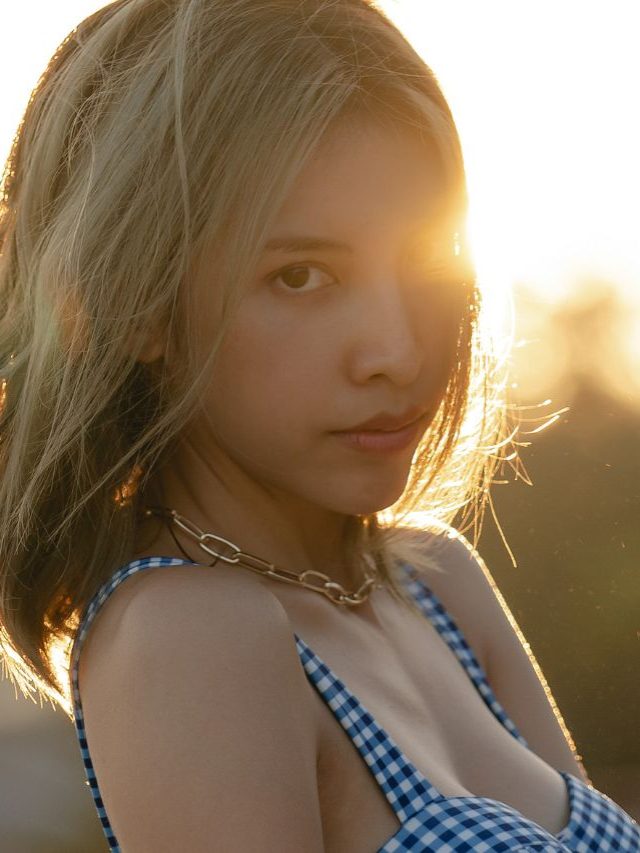
The morning and afternoon is the best time to go out with your new light-capturing device and play with the sun’s rays. When the sun is low in the sky the light rays hitting the surface are less intense. The difference between shaded and lit areas is lesser than at midday, and shadows are softer.
Let’s be real, the world really is just more beautiful during dusk and dawn, with streaming orange rays of light and lit up skies; ordinary scenes at midday look completely magical five hours later. Who wouldn’t want to be out during the morning or evening, when every click of the shutter is a new masterpiece!?
So there you have it, and it doesn’t really seem so scary anymore. Get out there, camera in hand, play with those buttons and capture the moments you love. The worst you can do it take a bad photo… and hey, that’s why they invented the delete button!